Polishing Peter I's Grivennik: How to Remove Scratches from a Rare Coin - AUCBURG | AUCBURG
Polishing Peter I's Grivennik: How to Remove Scratches from a Rare Coin
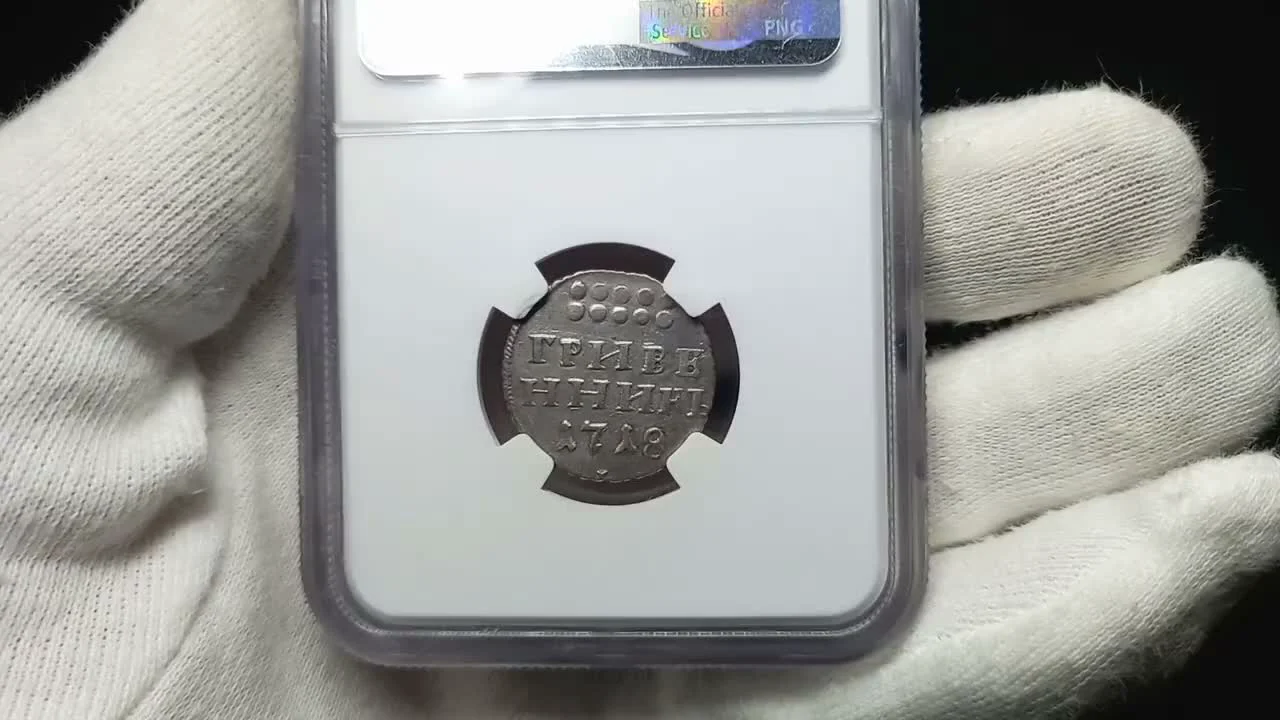
An interesting specimen came in for work: a 1718 grivennik of Peter I, encapsulated in a slab by the American grading company NGC. Such coins, especially in good condition, are of significant interest to numismatists.
An interesting specimen came in for work: a 1718 grivennik of Peter I, encapsulated in a slab by the American grading company NGC. Such coins, especially in good condition, are of significant interest to numismatists.
The coin's owner, however, is not a fan of storing small coins in slabs. His main request was not only to remove the coin from its plastic container but also to eliminate the noticeable scratches on its surface. There was hope that after delicate polishing and defect removal, the coin's grade could potentially increase.
Assessing the Condition Under a Microscope
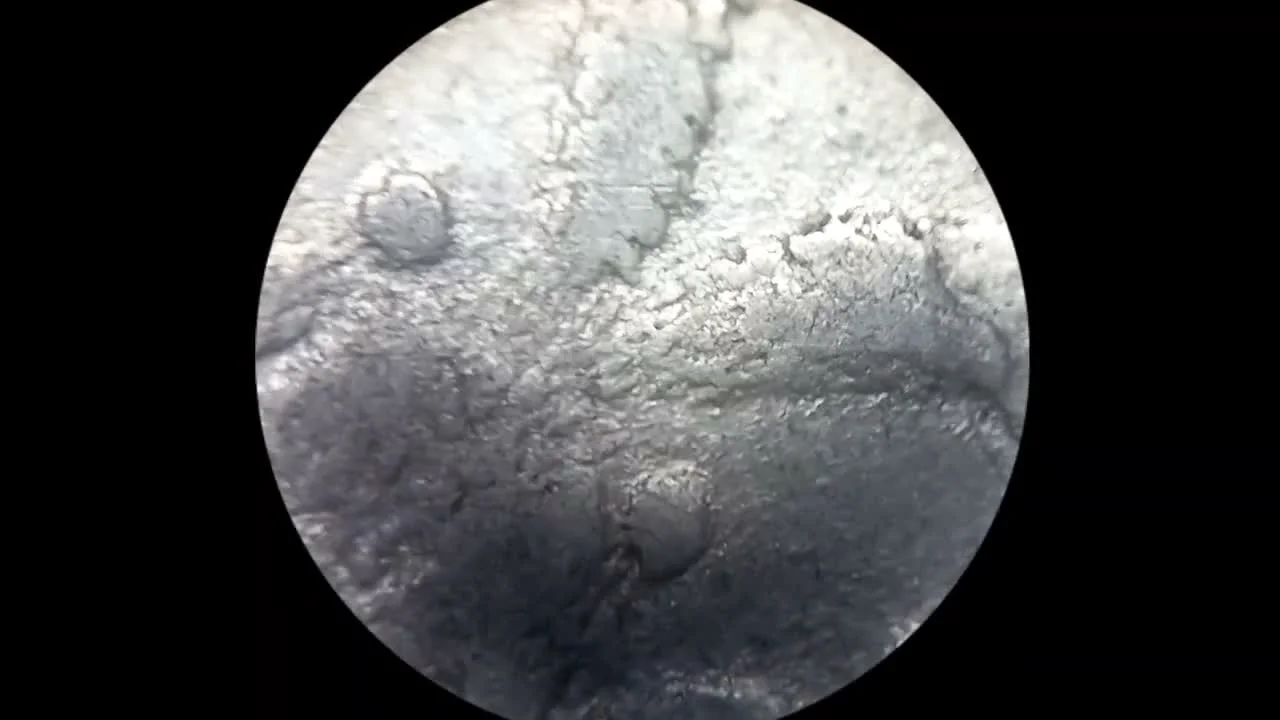
Before any work began, a thorough examination of the coin was conducted under a microscope while it was still in the slab. This allowed for a detailed study of the nature of the damage. The obverse (the side with the inscription "ГРИВЕННИКЪ") had numerous scratches that marred the overall appearance of the coin.
Presumably, these scratches appeared as a result of careless cleaning right after the coin was found. The reverse, featuring the double-headed eagle, was in better condition, although it also had minor defects. The main task was to polish the coin's field to eliminate these damages as much as possible.
Assessing the condition under a microscope
The Delicate Operation: Opening the NGC Slab
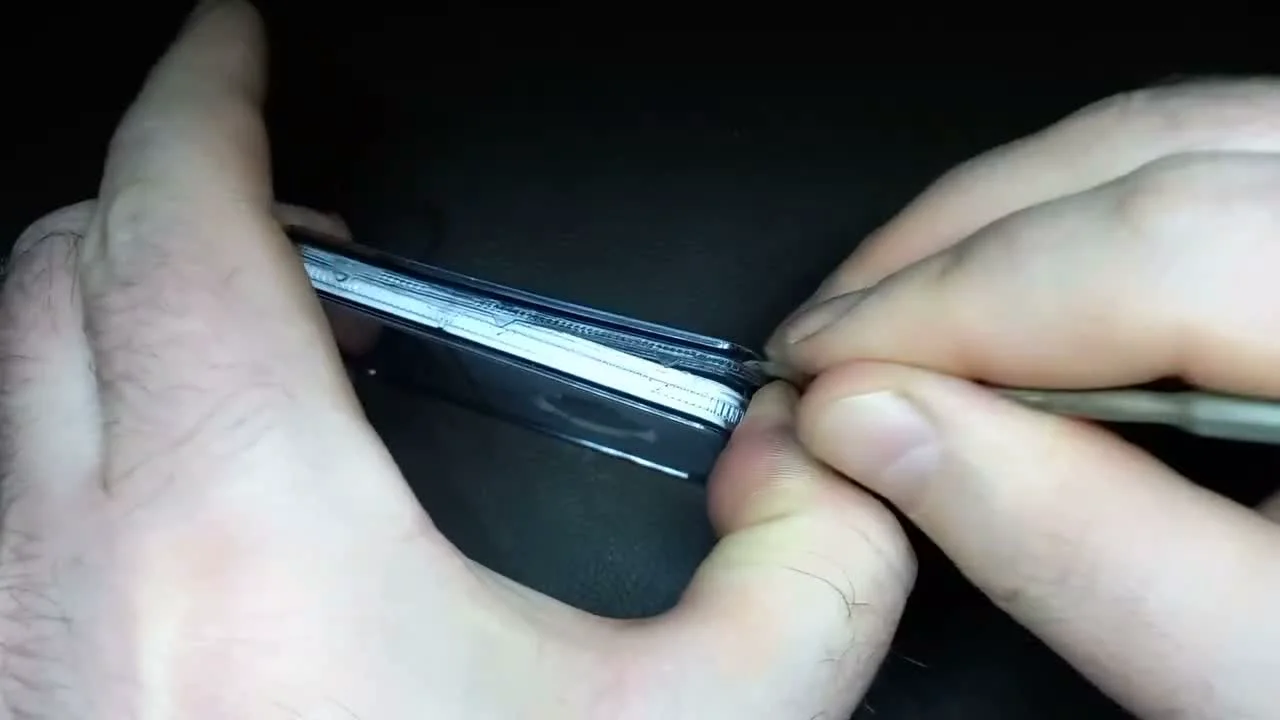
The process of removing a coin from a slab requires care. Instead of crude methods like using a hammer, a more gentle approach was chosen. Special thin metal spatulas were used to open it.
The work was done along the perimeter of the slab, where there is a special groove. The step-by-step opening process was as follows:
The tool is inserted into the groove on the side of the slab.
With careful movements, the plastic is pried to separate the two halves of the container.
The procedure is repeated around the entire perimeter until the slab is fully opened.
As a result, the slab was carefully separated into two parts without damaging it or, most importantly, the coin inside. After that, the grivennik was carefully removed from the white inner holder for further work.
The delicate operation: opening the NGC slab
Tools and Materials for Polishing
A specialized product was chosen to remove the scratches. It is a German-made silver polish that simultaneously cleans and delicately polishes the surface. The key feature of this compound is the presence of very fine abrasive particles, which allow for working on the coin's field without damaging the relief.
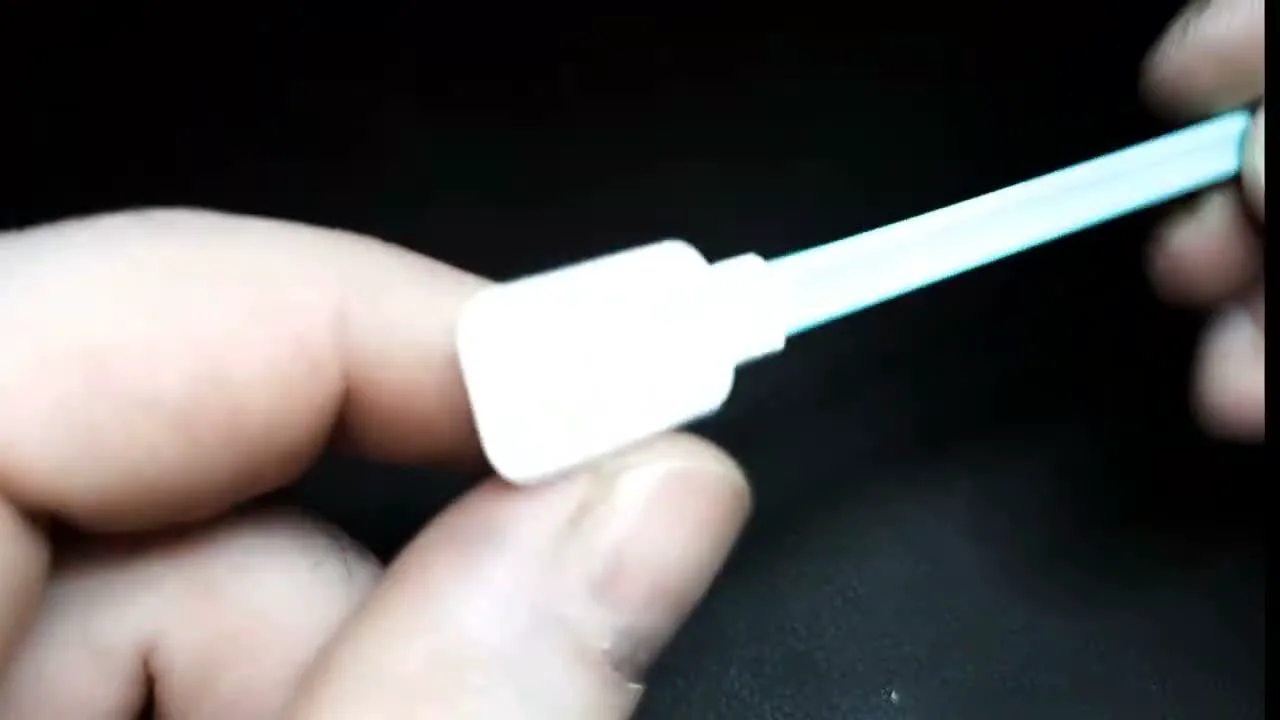
Instead of a regular cotton swab, a special optical cleaning stick was used as the tool for application and polishing. Its advantages are as follows:
Unlike cotton, it does not leave behind lint.
The working surface is very soft and does not scratch the metal.
This set of tools allows the work to be carried out as delicately as possible, which is critically important in coin restoration.
Tools and materials for polishing
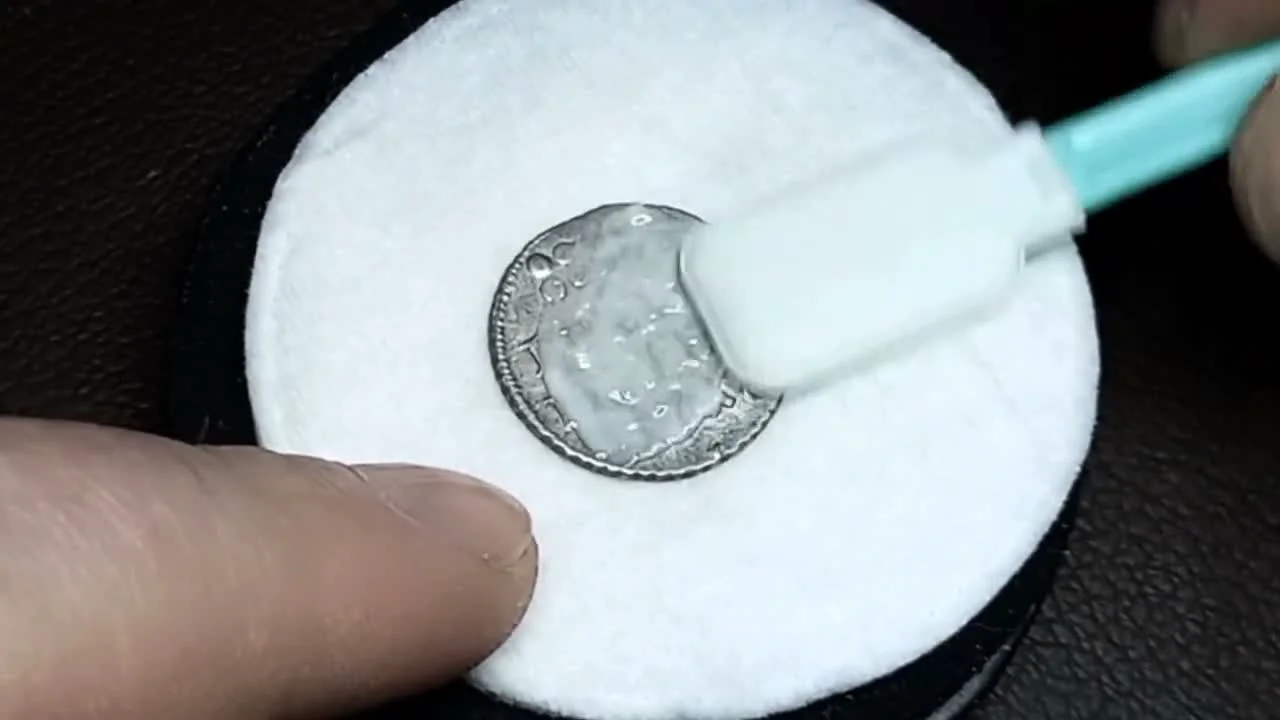
The Polishing Process: Working on the Obverse
Polishing began with the obverse — the side with the most scratches. A small drop of the cleaning agent was applied to the coin's surface. Then, using the optical cleaning stick, the compound was gently distributed over the coin's field without applying strong pressure.
The main work consisted of polishing the field specifically, taking care not to touch the relief of the letters and numbers. The process was multi-staged: after each polishing cycle, the coin was rinsed under warm water, and the result was assessed under a microscope. A total of four such cycles were performed.
After just the first pass, it was noticeable that the minor scratches were gone, and the coin had become cleaner. With each subsequent cycle, the result improved, and even the deeper scratches became less visible.
The polishing process: working on the obverse
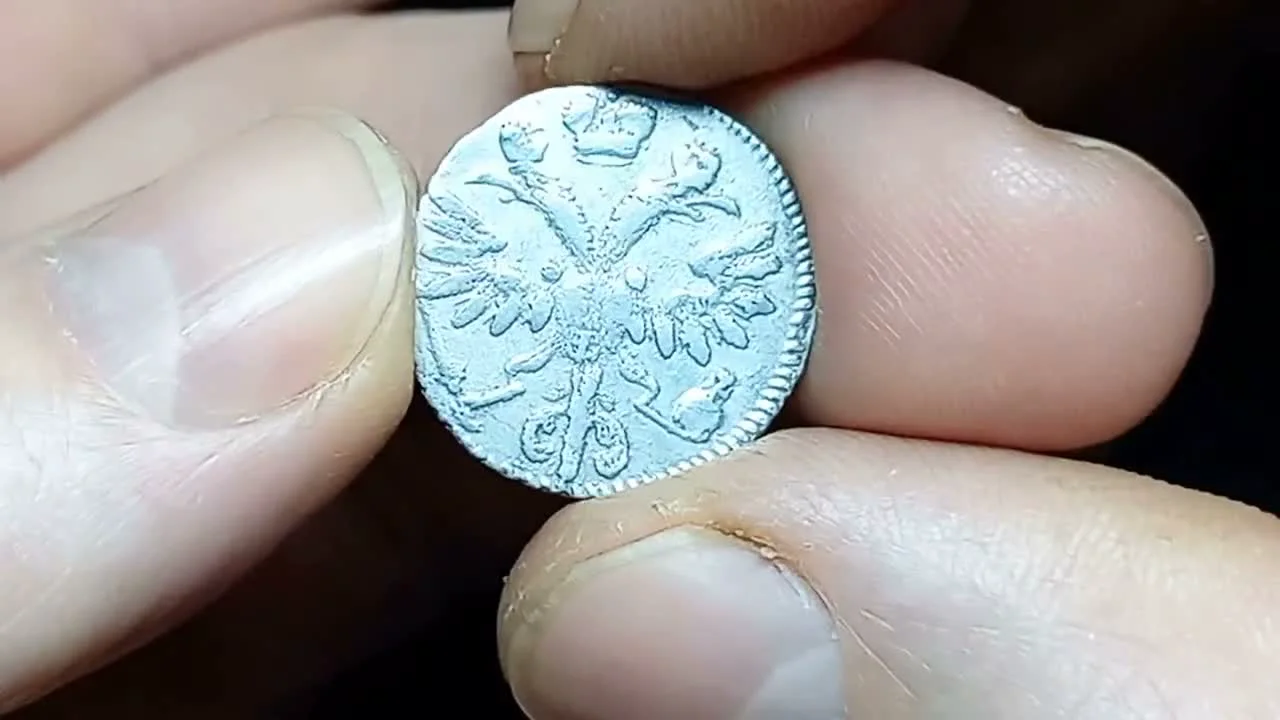
Finishing Touches on the Reverse
After finishing the work on the obverse, a similar procedure was carried out on the reverse. This side was initially in better condition, with fewer scratches, but it had dark spots and some minor defects.
The polishing process for the reverse was just as delicate. Special attention was paid to the areas with discoloration. As with the obverse, the same polishing agent and optical cleaning stick were used. This helped to even out the surface tone and remove the remaining minor scratches, giving the eagle a cleaner and more attractive appearance.
Finishing touches on the reverse
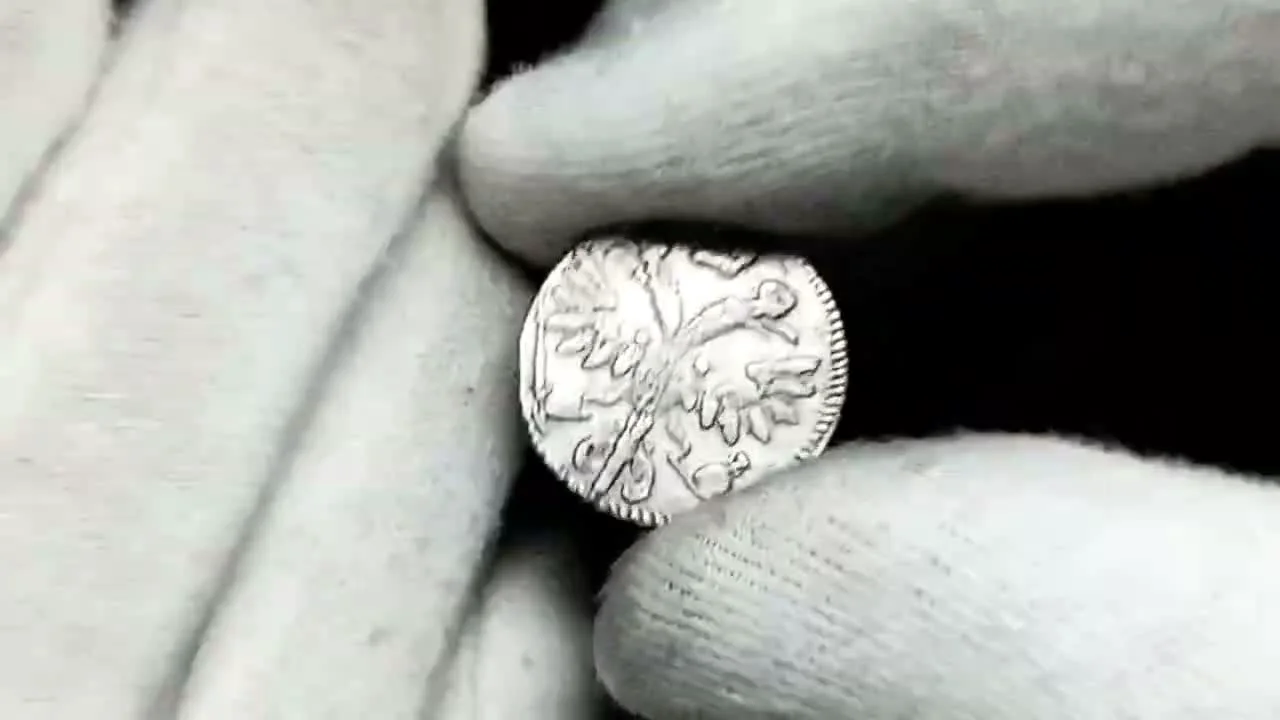
The Final Result: A Renewed Appearance for the Coin
Following all the procedures, the coin acquired a significantly better appearance. An examination under the microscope showed that most of the scratches, especially the minor ones, were successfully removed. The coin's field became smooth and clean.
It is important to note that the original metal "striations" — marks from the die — were preserved, which testifies to the gentle nature of the polishing. The relief of the letters and the eagle was not damaged. The deep scratches were minimized and are no longer conspicuous.
As a result of the work done, it was possible not only to remove the grivennik from its slab but also to significantly improve its appearance by eliminating the defects that marred the collectible appeal of this rare specimen.
The final result: a renewed appearance for the coin